
An electric bicycle makes commuting and everyday travel much easier—but like any bicycle, it can develop mechanical problems. One of the most common issues is a chain that suddenly comes off or breaks.
If this happens while you're riding, don't panic. In many cases, a chain that has simply come off can be put back on in just a few minutes. A broken chain requires a little more work, but you may still be able to make a temporary repair and get home safely.
This guide explains what to do if your electric bicycle chain comes off or breaks, what tools you need, and how to prevent the problem from happening again.

First: Stop Riding Safely
If you notice that the chain has come off or broken while riding, the first thing to do is stop pedaling and pull over somewhere safe.
Don't continue riding with a damaged or displaced chain. A loose chain can become caught between the sprocket, chainring, and other moving parts, potentially causing further damage or making the rear wheel lock up.
Before inspecting the chain:
- Move the electric bicycle away from traffic.
- Turn off the motor and remove the key if applicable.
- Keep your fingers away from the chain, chainring, and sprockets.
- If your bicycle has a removable battery and you need to work around the drivetrain, consider removing it according to the manufacturer's instructions.
- Put the bicycle on a stable surface.
Once the bicycle is safely stopped, determine whether the chain has come off or is actually broken.
If the Chain Has Come Off
A chain that has come off is usually much easier to fix than a broken chain.
The chain may have slipped off the front chainring, the rear sprocket, or both. This can happen because of shifting problems, a loose chain, worn drivetrain components, or an impact.
Step 1: Check the Chain
Look at the entire chain and make sure there are no broken, bent, or severely damaged links.
If the chain is intact, you can usually reinstall it.
Step 2: Place the Chain on the Rear Sprocket
If the chain has fallen completely off the rear sprocket, place it around the smallest rear sprocket first.
You don't necessarily need to put it perfectly into position yet. The important thing is to get the chain sitting correctly around the sprocket teeth.
Step 3: Put the Chain Back on the Front Chainring
Next, place the chain over the front chainring.
Make sure the chain sits properly on the teeth rather than resting on top of them.
Step 4: Slowly Turn the Pedals
With the motor switched off, slowly rotate the pedals forward by hand.
Watch the chain as it moves around the drivetrain. If it is correctly positioned, it should gradually settle onto the chainring and rear sprocket.
Do not use the electric motor to reinstall the chain.
The motor can rotate the drivetrain much faster than you expect, creating a significant risk of pinched fingers or other injuries.
Step 5: Test the Bicycle
Once the chain is back in place, check that:
- The chain moves smoothly.
- The pedals rotate normally.
- The chain does not skip or jump.
- The chain stays on the sprockets.
- There are no unusual noises.
Start with a short, slow test ride before returning to normal riding.
If the Chain Is Broken
A broken chain is different. Simply putting it back on the sprockets won't solve the problem.
You'll need either a chain repair tool and replacement chain link or a new chain.
For roadside emergencies, carrying a small bicycle multitool with a chain breaker and a compatible quick link can be extremely useful.
Option 1: Use a Quick Link
Many bicycle chains can be repaired using a compatible quick link, sometimes called a master link.
To do this:
- Remove the damaged section of chain.
- Make sure the remaining chain ends are undamaged.
- Insert the appropriate quick link.
- Lock the quick link according to the chain manufacturer's instructions.
- Check that the connection is secure.
- Slowly rotate the pedals and inspect the repaired section.
The quick link must be compatible with the chain's speed and width. Using an incorrect quick link can result in an unreliable connection.
If you're unsure which quick link your chain requires, it's safer to have a bicycle shop inspect it.
Option 2: Replace the Chain
If the chain is badly damaged, rusty, stretched, or has multiple damaged links, replacing it is usually a better solution than attempting a temporary repair.
An electric bicycle can place substantial loads on the drivetrain, particularly when the motor assists while you're pedaling. For that reason, a repaired chain should be inspected carefully before returning to normal use.
Can You Ride an Electric Bicycle With a Broken Chain?
It depends on the type of electric bicycle.
If your e-bike has a hub motor, the motor may drive the rear wheel independently of the bicycle chain. In some models, you may still be able to use motor assistance even when the chain is broken.
However, this doesn't mean you should continue riding normally.
If the broken chain is hanging loose, it can become caught in the drivetrain or wheel. A damaged chain can also indicate that another drivetrain component has a problem.
The safest approach is to stop riding and repair or replace the chain before continuing.
If you aren't sure whether your particular e-bike can safely operate without the chain, consult the manufacturer's instructions or a qualified bicycle mechanic.
Can You Ride an Electric Bicycle With a Broken Chain?
It depends on the type of electric bicycle.
If your e-bike has a hub motor, the motor may drive the rear wheel independently of the bicycle chain. In some models, you may still be able to use motor assistance even when the chain is broken.
However, this doesn't mean you should continue riding normally.
If the broken chain is hanging loose, it can become caught in the drivetrain or wheel. A damaged chain can also indicate that another drivetrain component has a problem.
The safest approach is to stop riding and repair or replace the chain before continuing.
If you aren't sure whether your particular e-bike can safely operate without the chain, consult the manufacturer's instructions or a qualified bicycle mechanic.
Why Does an Electric Bicycle Chain Keep Coming Off?
If your chain comes off once, it may simply have been caused by an incorrect gear shift or a sudden impact.
But if it happens repeatedly, there is probably an underlying problem.
Common causes include:
1. Incorrect Derailleur Adjustment
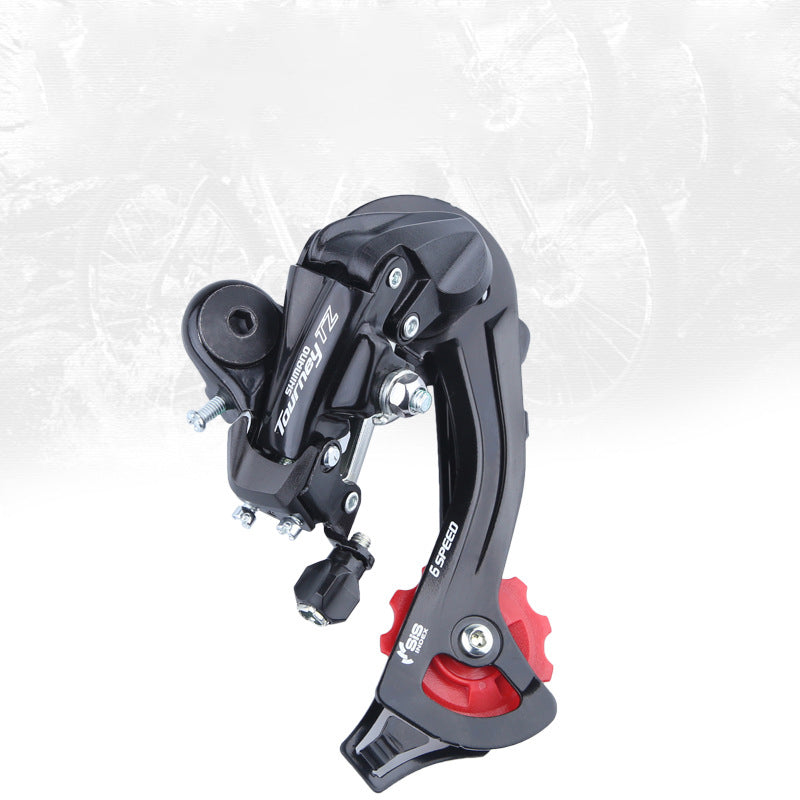
If your e-bike has a derailleur, incorrect limit-screw or cable adjustment can cause the chain to move too far toward the edge of the cassette or chainring.
This can make the chain fall off during shifting.
2. A Worn Chain
Chains gradually stretch as they accumulate mileage.
A worn chain may shift poorly, skip under load, or contribute to premature wear of the cassette and chainring.
3. Worn Sprockets
If the cassette or chainring teeth are significantly worn, the chain may not engage correctly.
Replacing only the chain may not solve the problem if the sprockets are already badly worn.
4. A Bent Derailleur or Hanger
A fall or impact can bend the derailleur or derailleur hanger.
Even a relatively small alignment problem can affect shifting and cause the chain to come off.
5. Excessive Chain Slack
On bicycles without a derailleur, an excessively loose chain can fall off more easily.
The correct chain tension depends on the bicycle's drivetrain design, so follow the manufacturer's specifications rather than simply tightening the chain as much as possible.
6. Shifting Under Heavy Motor Assistance
Changing gears while putting a lot of force through the pedals can place substantial stress on the chain and drivetrain.
When possible, ease off the pedals briefly when shifting gears, especially when climbing.
What Should You Carry in Your E-Bike Repair Kit?
If you regularly ride an electric bicycle, a small emergency repair kit can save you from a long walk home.
Consider carrying:
- A compatible quick link
- Chain breaker
- Tire levers
- Portable pump or electric inflator
- Spare inner tube if your bicycle uses inner tubes
- Multitool
- Disposable gloves
- Small flashlight
- Zip ties
- A small rag
The exact equipment depends on your bicycle and the type of riding you do.
If you're going on a long-distance ride, it's particularly worthwhile to learn how to use your repair tools before you need them.
How to Prevent Your E-Bike Chain From Breaking

Regular maintenance can significantly reduce the chances of chain problems.
Keep the Chain Clean and Lubricated
Dirt and moisture can accelerate chain wear.
Clean the chain periodically and apply an appropriate bicycle chain lubricant. Wipe away excess lubricant so that it doesn't attract unnecessary dirt.
Check the Chain Regularly
Look for:
- Rust
- Stiff links
- Damaged links
- Unusual noise
- Excessive wear
- Frequent chain skipping
If you notice a problem, deal with it before the chain fails during a ride.
Avoid Excessive Force
Try not to apply maximum pedal force while shifting gears.
Instead, ease off slightly, shift, and then resume normal pedaling.
Inspect the Drivetrain
Don't focus only on the chain.
Periodically check the:
- Chainring
- Cassette or rear sprocket
- Derailleur
- Derailleur hanger
- Chain tension
- Chain alignment
A chain that repeatedly comes off may be a symptom of another mechanical problem.
When Should You Call a Bike Shop?
Some chain problems are simple enough to fix at the roadside. Others require professional attention.
It's best to have your e-bike inspected if:
- The chain repeatedly comes off.
- The chain breaks more than once.
- The derailleur appears bent.
- The chainring or sprocket teeth are badly worn.
- The chain skips under heavy pedaling.
- You hear grinding or clicking after the repair.
- You aren't sure whether the repaired chain is safe.
- The motor or electrical system was damaged in the same incident.
Electric bicycles can be heavier and more powerful than conventional bicycles, so drivetrain problems shouldn't be ignored.
Final Thoughts
A chain coming off doesn't necessarily mean your electric bicycle has a major problem. If the chain is intact, you can often reinstall it by hand and carefully rotate the pedals to put it back into position.
A broken chain, however, should be repaired with a suitable quick link or replaced before you continue riding.
The most important thing is to stop safely, turn off the motor, keep your hands away from moving parts, and inspect the chain carefully before attempting a repair.
With regular cleaning, lubrication, drivetrain inspections, and a small emergency repair kit, you can greatly reduce the chance of being stranded by a chain problem.

